December 18, 2021, by Helen Whitehead
Advent Calendar #18: How to create a festive video message in Powerpoint
Today we show you a (reasonably) simple way to make a festive video message. It could be for your students, or if you’re not sure of the postal deliveries this year, even for your family and friends…
How to create a festive video in Powerpoint, step by step:
- Create a folder on your Hard Drive or OneDrive for the project
- Record a video message in Camera app on Windows, Photo Booth in MacOS, or using your mobile phone in landscape orientation (not portrait). Here are some tips:
-
- Wear a headset / microphone if possible;
- Avoid windows, lights, and screens in the video frame;
- Try to get camera elevation around eye level if possible (books can help elevate laptops);
- Tilt the screen so your eyes are one third of the way down;
- Have water to hand;
- Keep recording new takes until you get one you’re satisfied with.
-
- Move the video file into your project folder.
- For the Camera app on Windows the video files save to:
C:\Users\(username)\Pictures\Camera Roll - For Photo Booth in MacOS the video can be dragged from the app.
- For mobile phones the location varies, hopefully you can transfer e.g. by USB or OneDrive.
- For the Camera app on Windows the video files save to:
- Download music from the Free Music archive Christmas section and keep in your project folder.
- Download a festive frame from here (University of Nottingham only) and move into your project folder.
- Open PowerPoint.
- Drag the video file onto a slide.
- Stretch it out (it might not fit properly, do your best).
- Trim the start and end
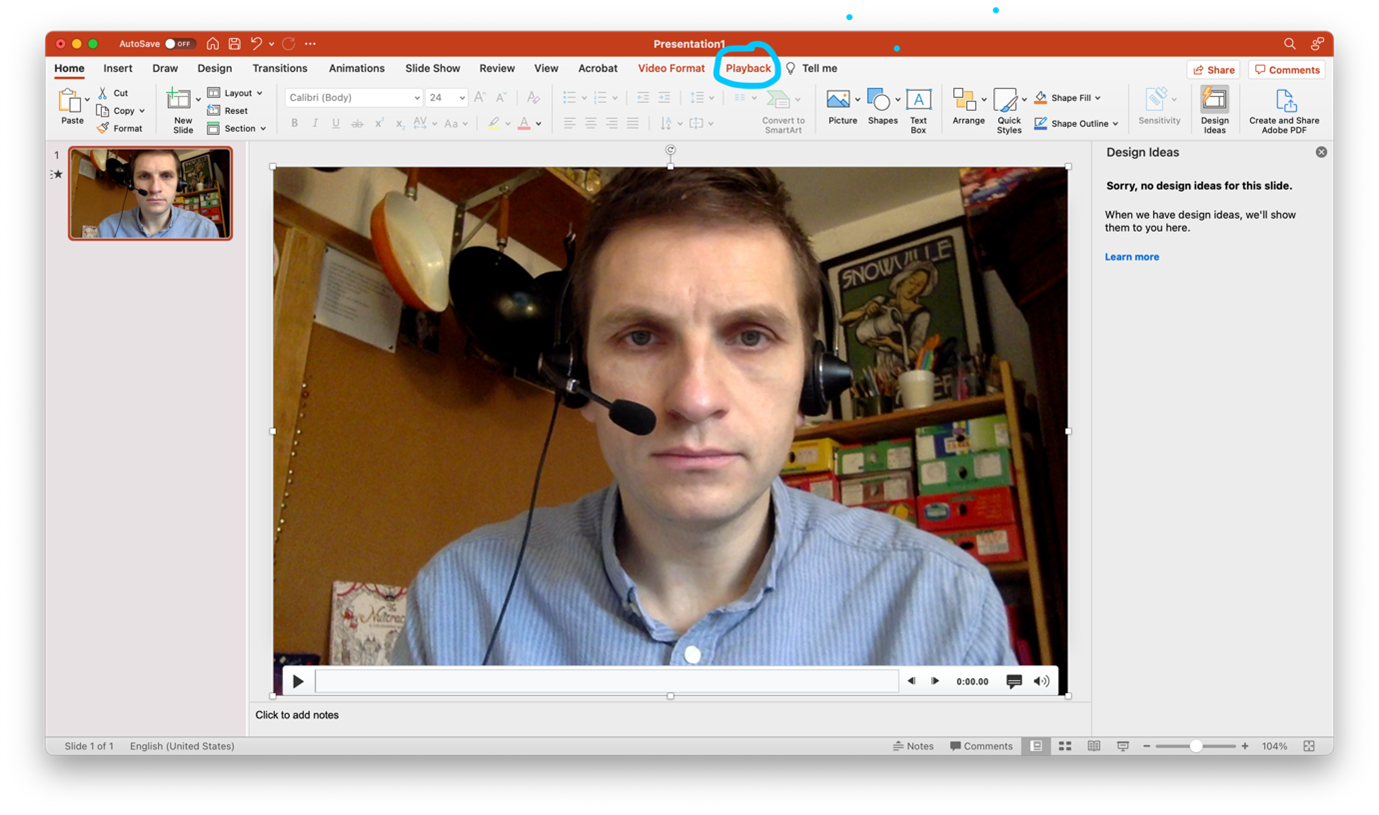
- Click on the video to make sure it’s selected
- Click on “playback”
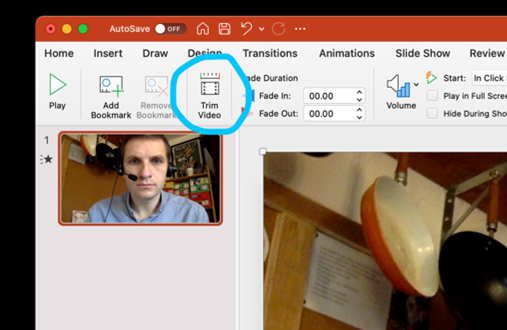
- Click on “Trim”
- Move the handles to change the start and end points, trimming away any false starts or long pauses.
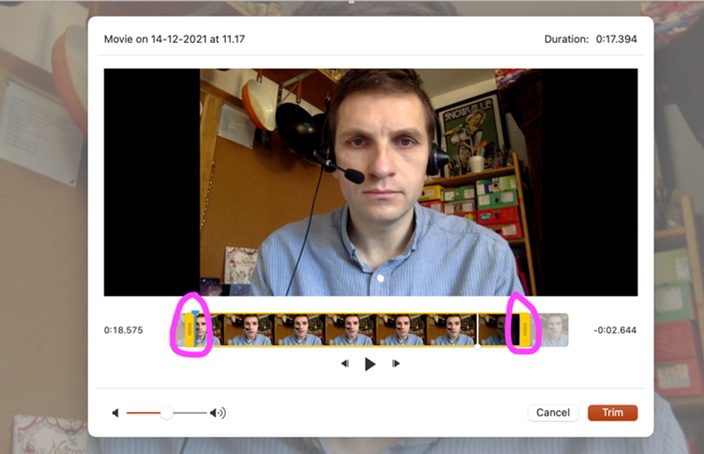
- Optionally boost the volume.
- Click “Trim” to action the edit.
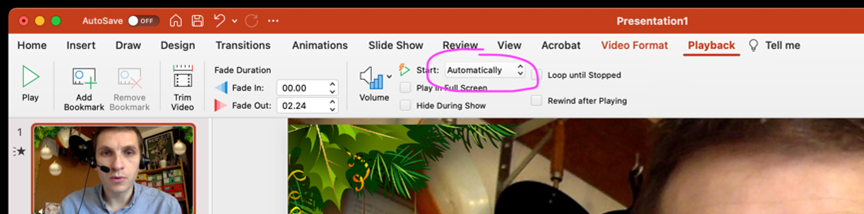
- Set video to start automatically.
- Click on video to ensure selected.
- Click on “Playback”.
- Make sure Start is set to “Automatically”.
- Drag your festive frame on to the slide.
- It can be hard to judge if the frame is positioned to the edge of the presentation. It should be the exact right size and snap to the edges when repositioned.
- Drag audio file onto the PowerPoint slide.
- Set it to play in the background.
- Click on the speaker icon (to ensure audio is selected).
- Click on “Playback”.
- Make sure the “Play in background” button is selected.

- Now balance the sound.
- Click on the speaker icon.
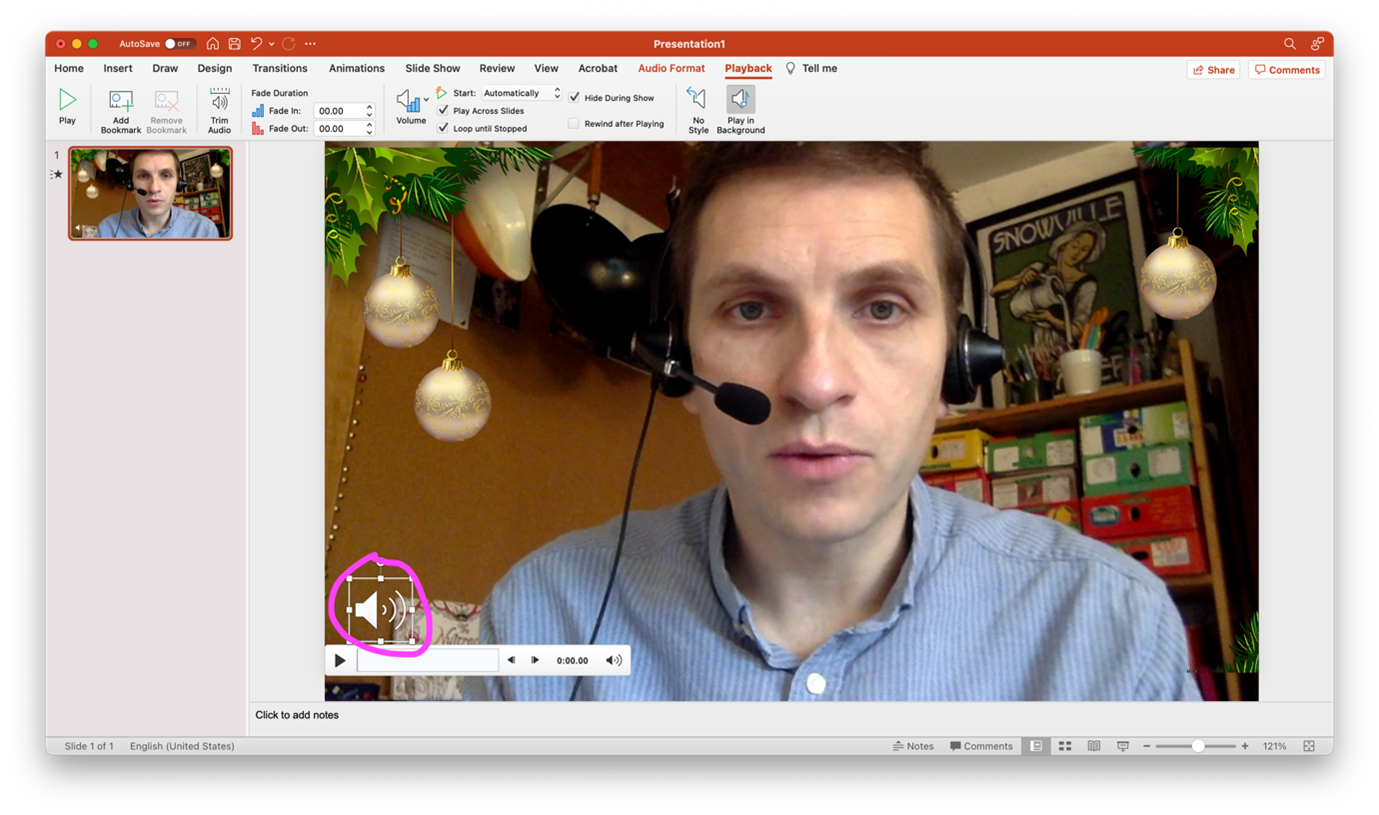
- Adjust the volume to be very low, probably as low as you can get before muted.
- Click on the speaker icon.
- To export the video:
Note: PowerPoint on MacOS doesn’t apply volume changes, if needed use Windows to export- Click the drop down menu “File” at the top of the screen then “Export”.
- On Mac change the file format to mp4, default settings should be fine.
- On Windows select “Create a video” then “Create video”.
- Choose your project folder for the export file’s destination.
- Wait a moment for the export to finish (see the progress bar down at the bottom of the PowerPoint window).
- Review your video to ensure it’s presentable (fix issues if needed, using the above steps).
- Upload to Moodle or Teams or send to your friends and family!
From Joe Bell, video content specialist, Learning Technology
Advent Calendar 2021
- #17: Digital Drop-in
- #16: Where to get help and what to do when something goes wrong
- #15: Adding your profile picture in Moodle
- #14: Monitoring student engagement in Moodle
- #13: MediaSpace captions tips and tricks
- #12: Letting students annotate PowerPoint slides during a MS Teams meeting
- #11: Free practical webinars on Accessibility in teaching
- #10: Getting it together with Groupings in Moodle
- #9: Christmas Mix and Match: memory games in Moodle
- #8: Moving files between MS Teams
- #7: Box of Broadcasts
- #6: Q&A: a new student engagement app from Microsoft
- #5: Avoiding plagiarism this essay season
- #4: Ways to poll your students
- #3: Have you thought about using Moodle Quiz?
- #2: How to make a Stream video available to students
- #1: A festive use for H5P
- The Advent Calendar in Moodle with doors to open (UoN only, sorry)
No comments yet, fill out a comment to be the first

Leave a Reply