March 18, 2022, by Helen Whitehead
Screen Sharing Options available to the presenter during a Microsoft Teams Meeting
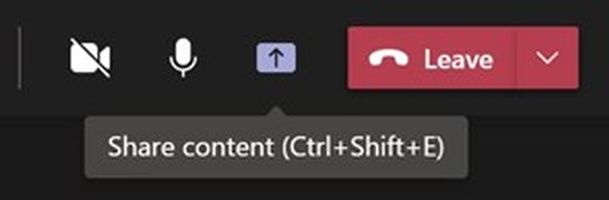
How often in a Teams meeting have you said “Can you see my screen?” over the past couple of years? I am guessing a lot. However, are you aware of all the options available when you click on the Share icon in a Teams meeting? If not, you will be by the end of this blog post.
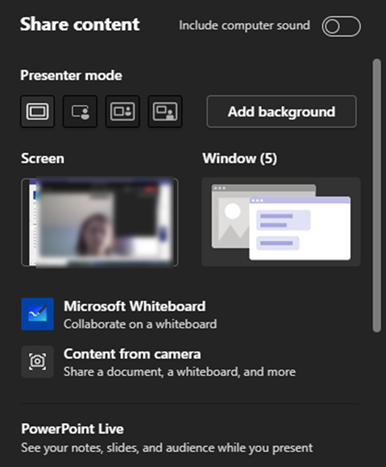
Right, you can see a screenshot of the Share content menu and the different options which are available to the presenter when they are sharing their screen. Besides choosing whether to share a screen or a window, there are the following sharing options:
- Presenter mode – settings on how the presenter appears with their content.
- Microsoft Whiteboard – an interactive whiteboard for presenting on or collaborating in Teams meetings.
- Content from camera – sharing physical documents and whiteboards in a Teams meeting.
- PowerPoint Live – a way to share a PowerPoint from within a Teams meeting.
Presenter mode
When you are sharing your screen in a Teams meeting, there are a number of Presenter modes are available to you. By default, it is set to Content only which will just display your shared screen / content on screen. However, there are three other modes available which can enhance the Teams experience which are: Standout, Reporter and Side-by-side.

Standout mode (left above) overlays your video on top of the content for a more immersive presenting experience.
Reporter mode (centre above) places content as a visual aid above your shoulder like a news story. The presenter takes up the biggest proportion of the screen in this format which means it’s best for facial expression include lip reading which is good for accessibility.
Side-by-side mode (right above) does what it says and displays your video feed next to your content.
Please note: At time of writing, this feature is only available via the Microsoft Teams desktop app.
Further resources: See more about Presenter mode.
Whiteboard
A recent blog post focussed on the new version of Microsoft Whiteboard and the ability to insert documents such as PowerPoint slides into a Whiteboard.
If you choose the Microsoft Whiteboard option in Share content the Whiteboard that opens is shared with your students. The new version of Whiteboard includes a range of templates which can be adapted for the specifics of the Teams meeting. Your students are invited to annotate the Whiteboard as soon as you’ve screen shared the Whiteboard with them. The Whiteboard (including added content) is available to attendees after the Teams meeting has finished.
Further resources: Find out more about using a Whiteboard in Microsoft Teams
Content from camera
There is now an option to share content from camera (a physical whiteboard, a document/book or a live video) within your Teams meeting.
If you are sharing a whiteboard, the camera will find it and Teams will enhance it. Microsoft recommend that the whiteboard is centre of frame and placed around 0.9–1.2m (3-4 ft) away from the camera. One of the great features of this is that it turns the presenter into a “ghost” so attendees can still see the whiteboard contents. It also allows you to take a snapshot of the whiteboard and post it in the meeting’s chat. This means you can erase the whiteboard and still have a record of what it said previously.
However, if you are sharing a document, you would probably need to set up an external camera on a rig so it can look down at the document. Once it is being shared, as with the Whiteboard, Teams will find it and enhance it for attendees. For instance, you might have a diagram and by sharing it this way you can interact with it and point certain features out.
The final way to share content from camera is through live video. This would be setting up a camera to record a live demonstration or a live event taking place. Here you could use an external camera or a built-in camera which would depend on your personal preference.
With all these options it is worth having a quick practice beforehand to make sure the camera is set up correctly and everything works as it should.
Further resources: Find out more about sharing Content from camera.
PowerPoint Live
PowerPoint Live allows you to share and display a PowerPoint presentation in a Teams meeting. You might choose this option instead of sharing your screen as you’ll be able to see the Teams Chat, see the raised hands from your audience, use the highlighter/ laser pointer, review the PowerPoint notes which you wouldn’t see if you were sharing your screen. As well as this, your attendees can independently move back/forth through the presentation so could move back to slide if they missed something. It also allows other presenters to take control more smoothly and avoid people having to say, “Next slide please.”
Further Resources: Here is a useful resource put together by colleagues at University of Nottingham highlighting what to be aware of when using PowerPoint Live.
Find out from Microsoft how to use PowerPoint Live in more detail.
 Present Live
Present Live is a way (separate from Share content) of presenting your PowerPoint slides to your students that enables them to see the presentation live on their devices and at the same time read live subtitles in their preferred language while you speak. Your students can also use “pinch to zoom” to see the slides more clearly on mobile devices, give feedback, send live reactions to the presenter and navigate back to review previous slides in your slide deck during your presentation. Recommended for the more advanced Powerpoint user.
An important point to make is that ‘Present Live’ will only work when you choose to share your screen in Share content.
Further Resources: The features of Present Live are explained in more detail as is how to get started.
This video entitled A Guide to using the present live function in Microsoft PowerPoint may be useful.
No comments yet, fill out a comment to be the first

Leave a Reply