May 13, 2024, by Laura Nicholson
Using the HoloLens and Augmented Reality (AR) with Xerte to Create Escape Rooms
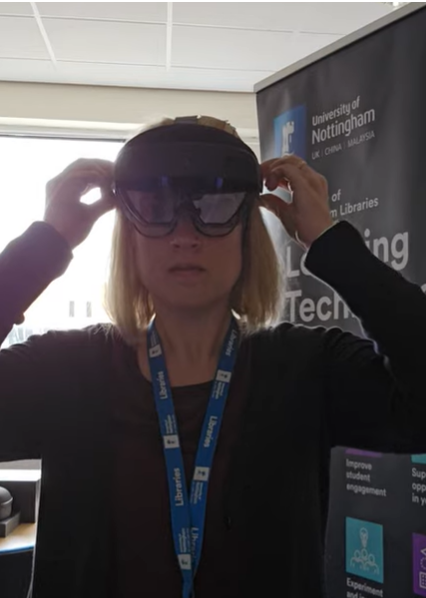
Me giving a demonstration of the HoloLens headset.
(Reading time – under 4 minutes)
Learning Technology has recently had the pleasure of speaking at the Escape Room Showcase hosted by Heriot-Watt University. Our presentation was about an escape room we created that combined the open-source software Xerte with the augmented reality benefits of a HoloLens.
Following the presentation, we were asked what advice we would give others thinking of creating an escape room, so I thought it would be good to share the different steps we took when creating our escape room for this week’s blog post.
Twelve steps to creating the perfect escape room
Step 1
First, determine the learning objectives to ensure a clear focus throughout the design process on what you want students to achieve.
Step 2
Work out the basics, such as how many students will be involved in each escape room group and how long you want the escape room to last.
Step 3
Have a strong storyline. The story and task are the most important parts in terms of engagement and student motivation, so focus on getting that right first. Artificial intelligence (AI) can be helpful to get initial ideas flowing regarding the storyline. I started off by asking one of the chat platforms to write me an escape room game based on cardiopulmonary resuscitation (CPR). What was suggested was far from the end product, but it did provide me with a good starting point. We also used AI-generated videos in our escape room to create a realistic and interactive narrative throughout.

A view through the HoloLens. The player is listening to an AI generated video to create the feeling that they are having a real conversation with a person in the escape room game.
Step 4
Make accessibility the foundation of the design. Creating an escape room that is accessible from the outset saves time later.
Step 5
Think about the puzzles you want to include. Too many can become overwhelming and run the risk of key learning goals becoming lost. Additionally, vary the puzzles to ensure different skillsets are being used within the group. We used a mix of digital and paper-based activities in our escape room. Below, you can see an example of a paragraph sorting activity. The paragraphs contained information relating to CPR, and the students had to place each one in a logical order. If they had the correct order, when they turned over each paragraph, it would reveal there was a map on the other side, which they used to direct the HoloLens wearer to where they needed to travel.

The players had to read through the paragraphs and place each one in the correct order to create a fluent piece of text. Then the players turned over each section to reveal a map, which helped them progress to the next screen.
Step 6
Create a storyboard; this will enable you to see how well your story works and where it would be best to include puzzles to ensure fluency and interest.
Step 7
Use software you are comfortable with. You don’t need complex software to create escape rooms. We used Xerte in our escape room due to its accessible interface and numerous interactivity options. With Xerte, you can easily add videos, audio, quizzes, hotspot activities, lockable screens, flashcards, crosswords, and 3D models. We also hid codes inside the models for students to find.

You can have multiple Xerte screens placed around the room for the HoloLens wearer to interact with.
I have seen many impressive escape rooms created with various Microsoft products too. PowerPoint slides can be a good option to get started with, whereby a picture of a room can be used as the background image, and then images of objects and tools can be added on top that have hyperlinks to documents and online puzzles. I’ve also seen Microsoft Forms being used, with the branching questions used to develop the story and settings fixed where the players can only progress when questions are correctly answered. Microsoft OneNote also provides some great options, as you can embed audio and video, and you have the option to lock progression until a password has been entered.
Step 8
Add in hints to prevent boredom. If the quizzes are too difficult, students will become bored and disinterested, so adding in hints is useful. In our escape room, we did this by using the flashcard option in Xerte. The HoloLens wearer and the group of seated participants also had access to slightly different clues to encourage discussion and collaboration.
Step 9
Test the escape room; if possible, form a focus group and give people the opportunity to give feedback on the design and learning taking place. This was really useful for us, as it highlighted a slight weakness in the storyline in that it became a little lost in the middle section of the escape room. It also helped me assess the difficulty level of the puzzles and quizzes, as initially they were slightly easy. Another amendment I made was to remove a 360 resource. I loved the inclusion of it as it meant the HoloLens wearer could move around a building by just tapping the screen, but when I tried this resource out on people less familiar with the movements and gestures of the HoloLens, it highlighted that many had difficulty with the navigation.
Step 10
Review and repeat the testing phase as many times as necessary before going live.
Step 11
When students have completed the escape room, debrief and evaluate. Check if students have achieved the desired learning objectives and address any misconceptions.
Step 12
Review the escape room and make any improvements before the next run-through.
No comments yet, fill out a comment to be the first

Leave a Reply