May 9, 2023, by Faraz Khan
Text Translation using Azure Cognitive Services Translator
In this blog, we describe how to translate text using some simple Python code and the Azure translator service.
Azure Text Translator
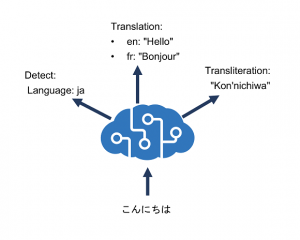
Azure Cognitive Services Translator is a cloud-based service that enables quick and accurate translation across many languages. The translator service can be used for:
- Language detection
- One-to-one or one-to-many translation
- Script transliteration (text conversion from its native script to an alternative script)
Supported Languages
The Azure Translator Service (v3.0) supports 129 languages. If the source language is known, you can specify this. If the source language is unknown, Azure can detect it. For a list of supported languages (along with their language codes), please refer to the language support page.
Pricing
Azure provides a free tier for the translator service. The free tier allows for 2 million characters per month (about 1,500 pages of single-spaced, 12-pt font text). If you intend to translate more than this, see the pricing page (UK South region).
How to use the Translator API
Create The Translator Resource
You will first need an Azure account. A free account can be created here. After creating your account, a translator resource must be provisioned:
- Login to the Azure Portal.
- Create your translator service resource by selecting it from the menu at this link: Create Translator.
- Select the region where you want the resource to be located. The region dictates where your data will be stored and processed. If you want your data to be stored and processed in the UK, then select either “UK South” or “UK West”.
- For pricing, select either the Free (F0) pricing tier or the pay-as-you-go (S0) tier.
- Click Review + Create
Get Your Authentication Keys and Endpoint
To use the API, you will need the authentication keys and endpoint of the resource you have just generated.
- After the resource is generated, click “Go to resource”.
- In the left column, select “Keys and Management”.
- This will open the following page:
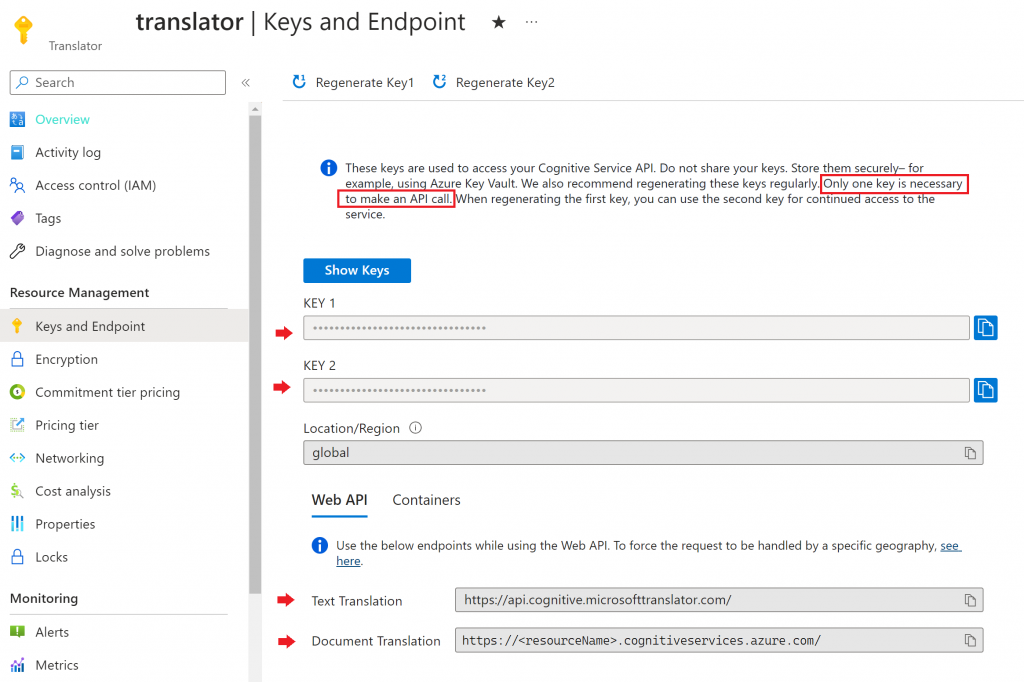
Copy Key 1 or Key 2 as well as the endpoint URL. These will be used in the python code (see below) to make the translation request.
Python Setup and Code
Once you have your keys and endpoint, please visit this SharePoint page for instructions on setting up your python environment and for the copy-and-paste code. This is the final step to using the service and translating your texts.
If you are interested in talking about this process, please feel free to contact one of the team.
Sorry, comments are closed!