April 16, 2020, by Digital Research
Exploring photogrammetry and digital 3D models
You can create good-quality digital 3D models without technical knowledge or the need for costly equipment. In this blog, we use a mobile-phone and some free software to create an interactive 3D model.
Each year, the Digital Research Specialist Team runs ‘digital initiatives’, an opportunity for researchers to explore new and emerging technologies. Past examples have included immersive videography, cloud computing, virtual reality, eye-tracking devices, and digitalisation techniques. This year, we are helping researchers across the University on a variety of projects, two of which involve photogrammetry (that is, using photos to extract complex information about physical objects and spaces). Dr Steve Dugdale, from the School of Geography, is working with our resident HPC expert Colin Bannister to harness the University’s High Performance Computer for generating models of river beds from drone photography. Colleagues in the Mixed Reality Lab are exploring optimal workflows for modelling small objects in three dimensions. Interest has come from the Department of Classics and Archaeology, the School of Veterinary Medicine and Science, and the School of Medicine.
Working from home without access to any special equipment seemed like a good opportunity to try creating a 3D model with just a phone and a laptop computer (if you want to jump straight to the model, it’s at the end of this blog post).
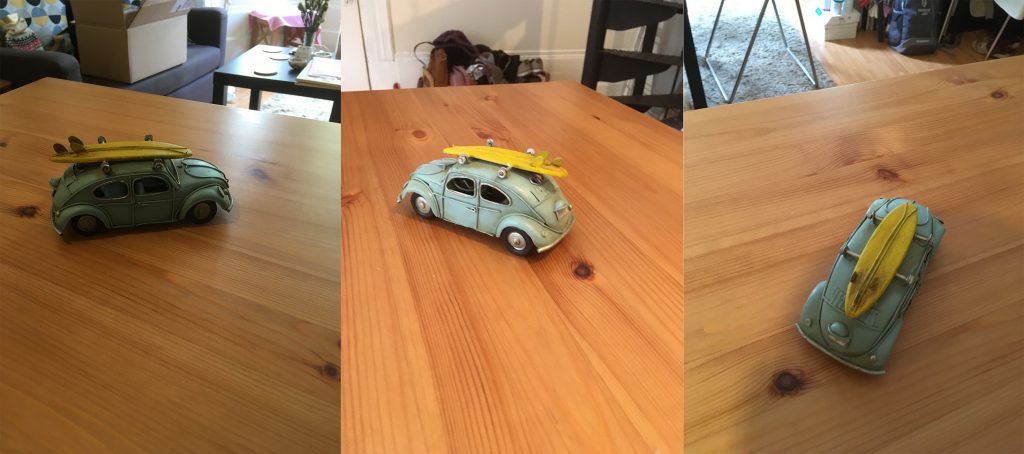
We took forty-five static photos of an object, using a 12-megapixel camera on a mobile phone (2016 iPhone SE). No attention was paid to lighting or the background. You can see that the image quality was mixed. Several of the photos have shadows, the lighting is inconsistent, and the distance between camera and object varies:
Using the OneDrive mobile app, the photos were uploaded directly from the phone to a University OneDrive account. The next step was to make the 3D model. For this, we used a free piece of software called Meshroom.
Meshroom is a powerful tool that allows users to personalise the model-creation workflow by adding filters and adjusting meshing, scaling, and texturing options. However, the default settings are more than adequate. Just upload your photos and hit START. It took about twenty-five minutes to generate the model.
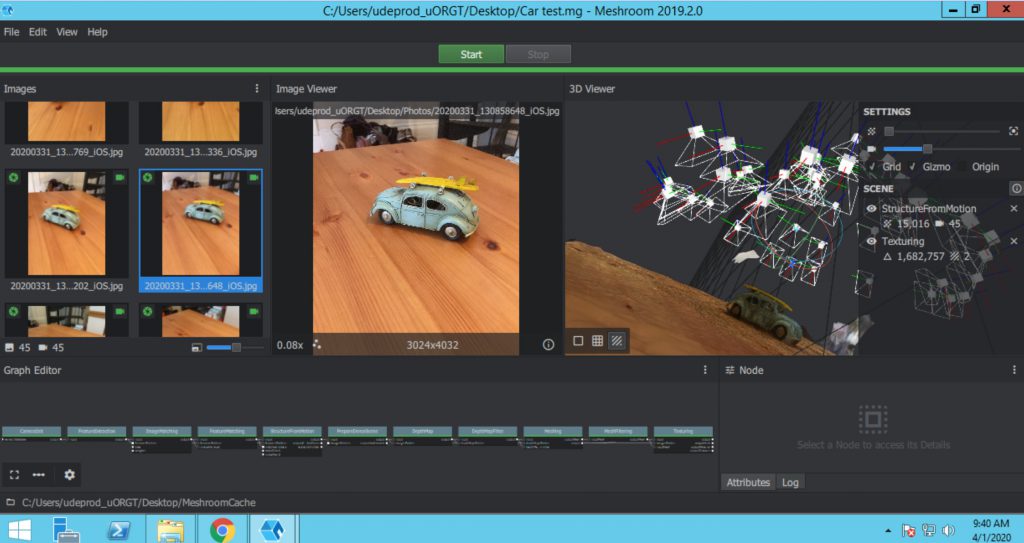
On the left-hand side you can see the uploaded images. The right-hand panel shows the 3D model and an approximation of the camera angles for each of the photos.
Caveat 1: Meshroom needs a computer with a GPU (graphics processing unit) to create its models. As my home laptop does not have a GPU, I had to run the software on a virtual machine (in this instance a Windows computer with an NVIDIA Tesla M60 GPU). If you are interested in accessing virtual machines, please contact a Digital Research Specialist.
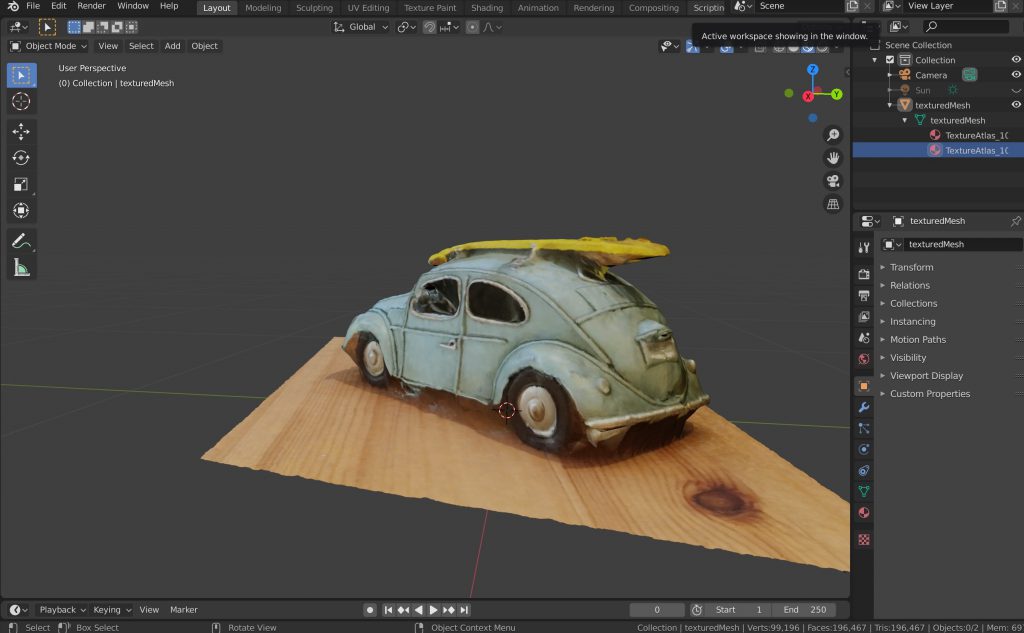
To prepare the model for publication, we used another piece of free software, called blender:
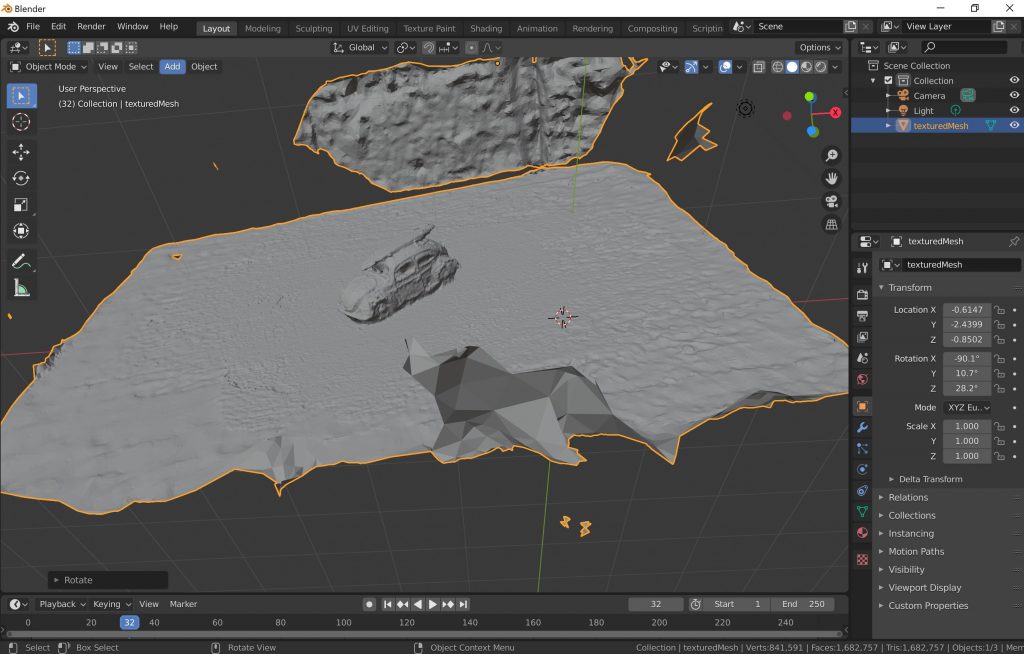
Caveat 2: using blender (a tool that supports video editing, digital sculpting, animation, and more) requires a little learning and experimentation, but the results are worth it. It took a couple of hours to learn the basics. This video was helpful.
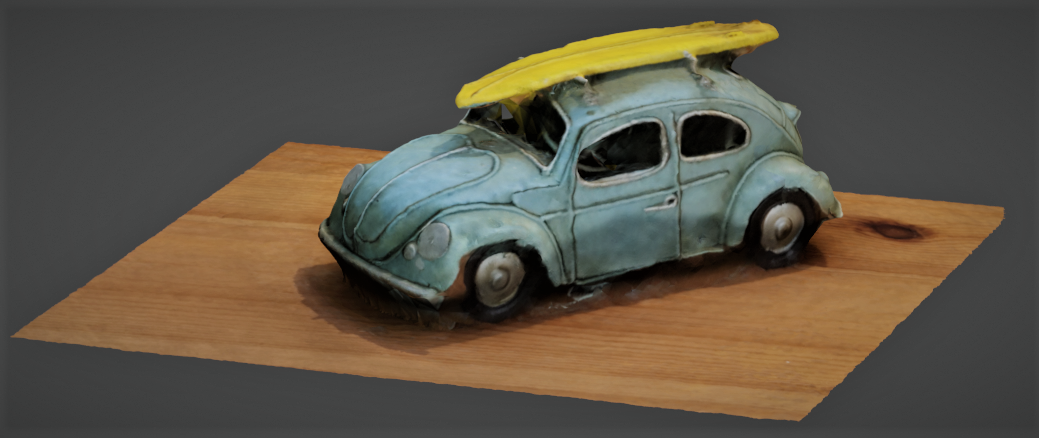
Here’s what our model looks like after cleaning and cropping:
The final step was to export the model as a 3D object. This can be done with little effort in blender. File sizes ranged from about 8MB to 25MB. We found that the most common formats (.obj, .fbx) could be opened and explored directly on a home computer, using the built-in 3D Viewer app. You can share models via the web platform Sketchfab, where uploads are given a unique address. Models can also be inserted right into a PowerPoint or Word file, adapted for 3D goggles, or even transformed into full-blown virtual reality experiences.
Sorry, comments are closed!