
January 11, 2016, by Ryan Neal
Enquiries part two – Assigning an enquiry
In this mini-series of posts we are walking you through some of the specific functionalities available within the system that comprises GoLive 2. In the last post we looked at receiving and responding to an enquiry in the Enquiry Centre. In this post we will be looking at assigning an enquiry to a member of staff outside of the Enquiry Centre. This happens when a member of the Enquiry Centre receives a question that requires detailed, perhaps course-specific, knowledge to answer, and so they’ll need to pass it on to someone with relevant expertise.
Step 1: Receiving the enquiry
Here you can see that we have a new lead, demonstrated by the ‘New’ status. The full enquiry can be viewed by clicking the ‘Notes’ tab.
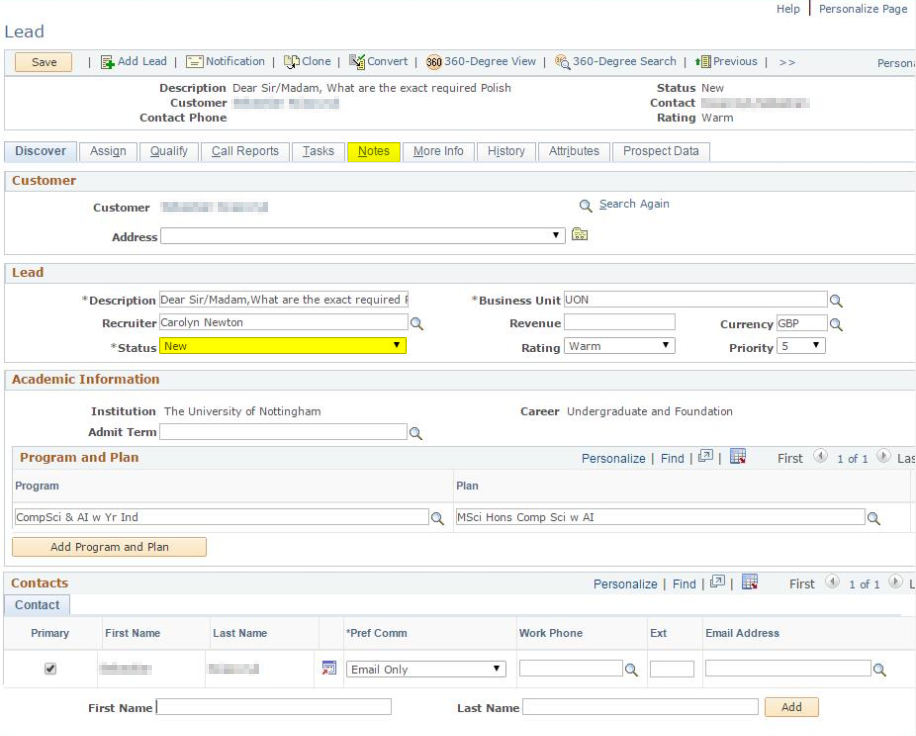
Click to enlarge
Step 2: Viewing the enquiry
As you can see, this is a very specific question that requires input from the International Office. Therefore, this question will need to be assigned.
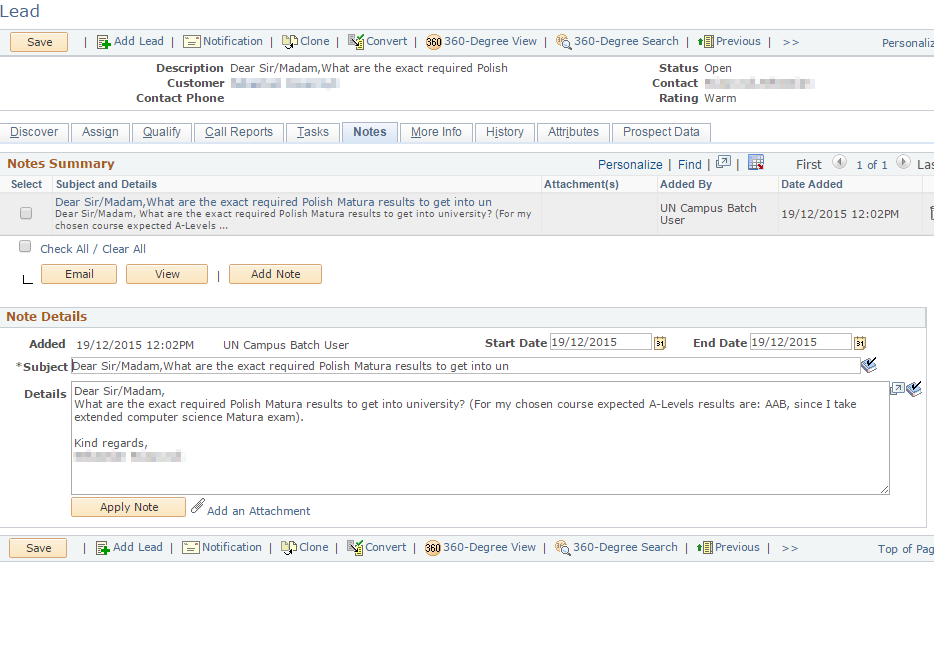
Click to enlarge
Step 3: Finding team members
The ‘Assign’ tab displays current team members. In the example below we can see team members in the Student Recruitment and Enquiry Centre (SREC).
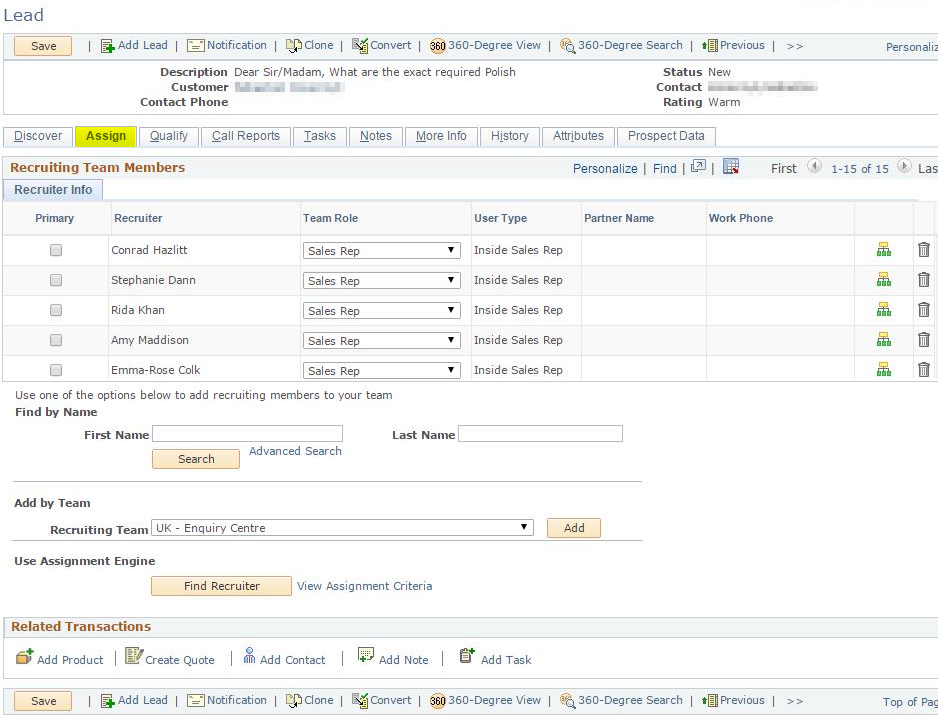
Click to enlarge
Step 4: Selecting a team
The dropdown menu along with the ‘Add’ button can be used to select the relevant team. In this case the enquirer had a question regarding Polish qualifications, so the relevant sales team is ‘UK – Intl Office Europe’ (International Office – Europe Team).
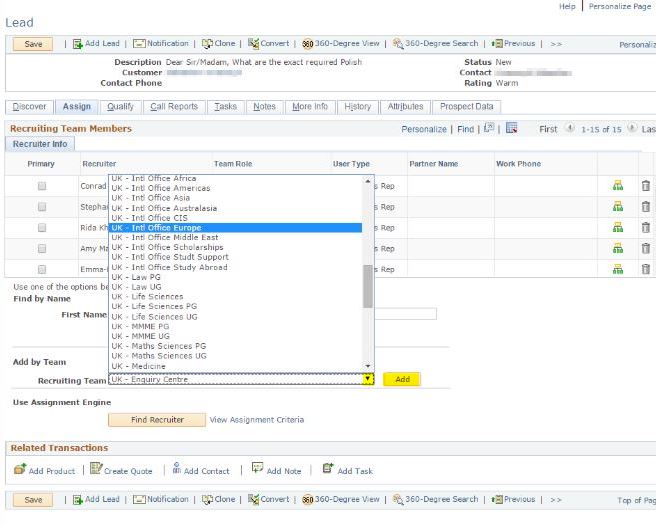
Click to enlarge
Step 5: Selecting a team member
From here a member of the team can be designated to answer the query by ticking the appropriate tick box in the ‘Primary’ column. The lead should then be saved using the ‘Save’ button at the bottom of the screen.

Click to enlarge
Step 6: Checking the lead has been assigned
Once the enquiry has been saved we can return to the ‘Discover’ tab, where the enquiry should now be displaying as an ‘Open’ lead. The ‘Recruiter’ field should display the name of the team member that we assigned the lead to in the previous steps.

Click to enlarge
We hope that this blog post has provided some insight into the functionalities available through the systems that support enquiries – thank you to Rida Khan for providing the screenshots and explanations. If you have any questions or feedback, please don’t hesitate to leave a comment below. You can also subscribe to the blog to have these updates emailed directly to you by entering your email address into the box in the top right corner of this screen.
No comments yet, fill out a comment to be the first
Leave a Reply