
January 4, 2016, by Ryan Neal
Enquiries part one – Receiving and responding to an enquiry
In this new mini series of blog posts you will have a chance to see some different functionalities available in the systems that were introduced as part of GoLive 2. In particular, you will be able to see these processes in action through the use of screenshots. In each blog post we’ll take a different functionality and walk you through the step-by-step process of operating that functionality in the new system. In this blog post we’re looking at receiving and responding to an enquiry.
Step 1: The enquiry form
Below you can see a copy of the enquiry form that enquirers use to find out more information about a particular field of study, or to ask a question about studying at The University of Nottingham. More information about the enquiries form can be found in the Enquiries Light blog post.
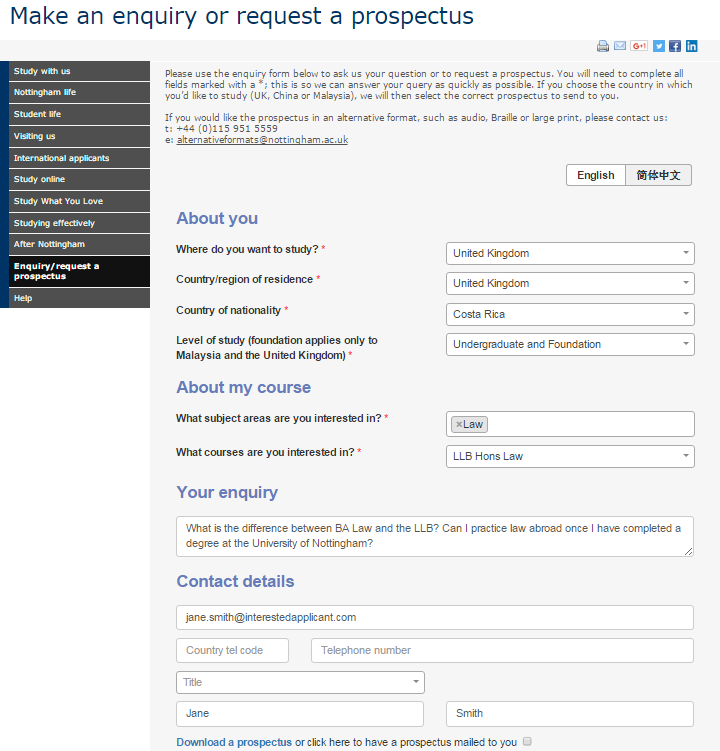
Click to enlarge
Step 2: Inside the system
Now if we take a look from the perspective of an enquiry handler, we can see a list of enquiries received through the enquiry form. These can be found by navigating to CRM > Sales > Search Leads. The search criteria has been set to show only leads that are ‘New’ and, as you will notice, our enquiry is at the top of the list.

Click to enlarge
Step 3: Enquiry details
If we click on the enquirer’s name (or the ‘lead’, to use the system’s terminology), then it will open up in the ‘Discover’ tab, providing the full details of the enquiry, including the course they are interested in and any information about the enquirer’s address that may have been provided.
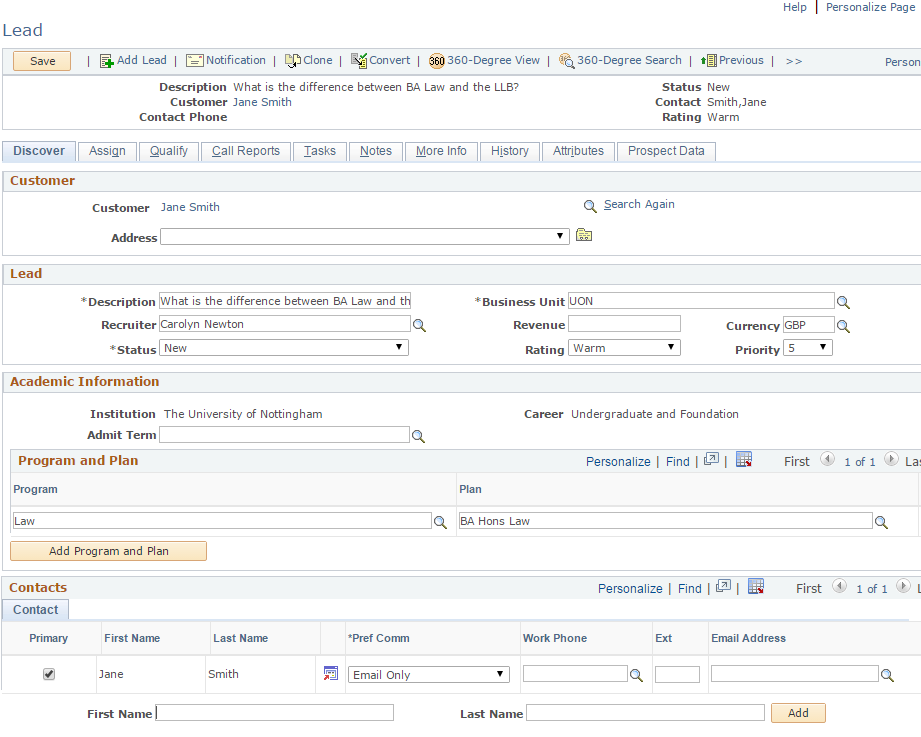
Click to enlarge
Step 4: Accepting the enquiry
At the bottom of the screen, a sales team member can now be selected to answer the enquiry – the enquiry can be accepted using the orange ‘Accept’ button.
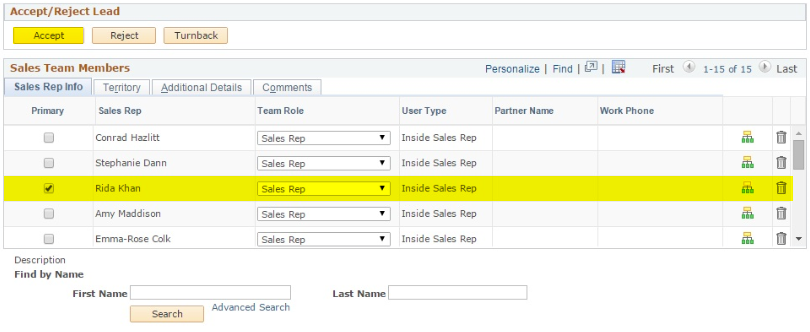
Click to enlarge
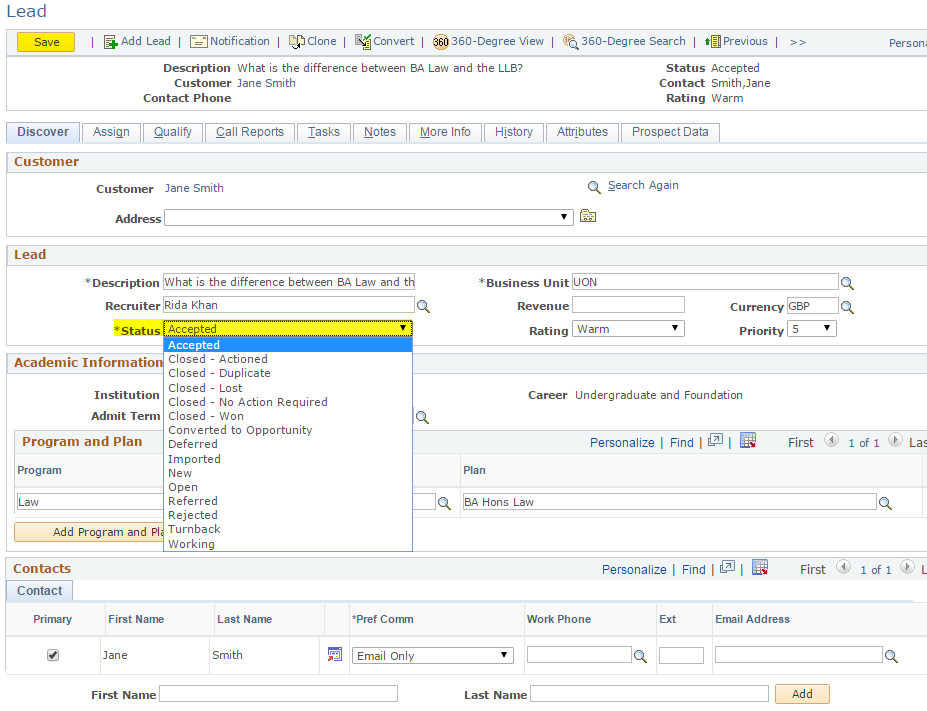
In the ‘Status’ field, the status of the enquiry now needs to be changed from ‘New’ to ‘Accepted’. The enquiry can be saved using the orange ‘Save’ button at the top of the screen. This will prevent other team members form accidentally answering the same query.
Click to enlarge
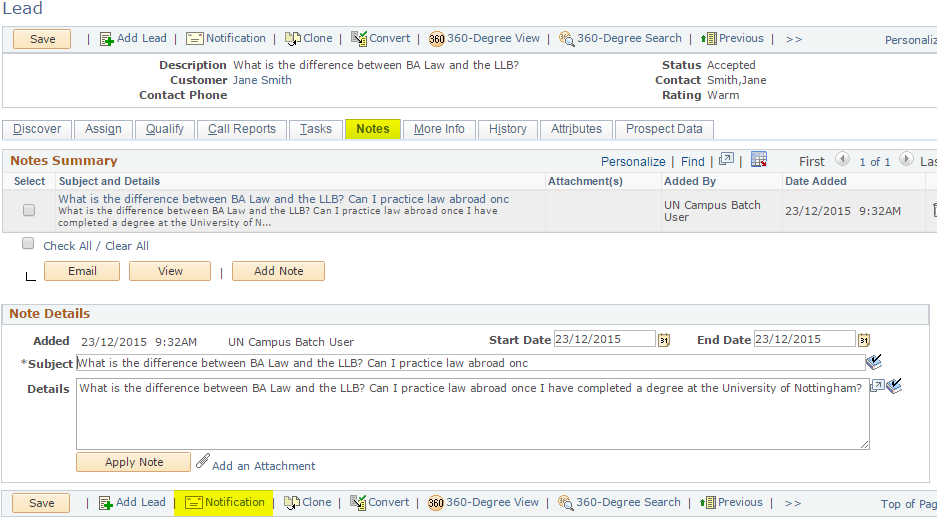
Step 5: Reviewing the enquiry
The full enquiry can be seen using the ‘Notes’ tab. To answer the enquiry, use the ‘Notification’ tab.
Click to enlarge
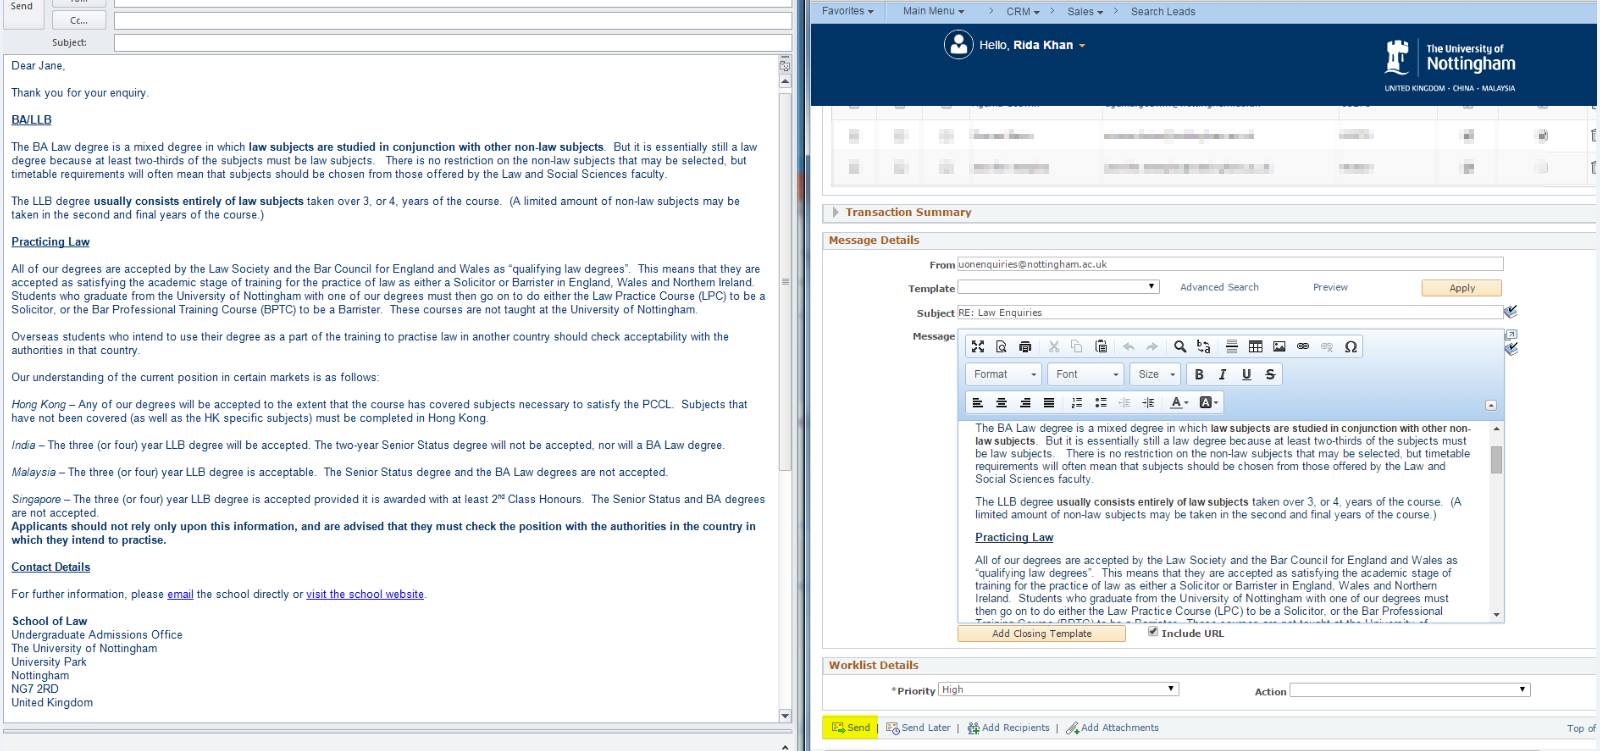
Step 6: Preparing a reply
The ‘Notification’ tab (see above) opens a screen that enables a reply to be sent to the enquirer. As with Outlook, it offers the standard ‘To’, ‘CC’ and ‘BCC’ options. If the reply needs to be sent/copied/forwarded to an individual that isn’t in the sales team (for example, a member of staff within a specific School) then email addresses can be added using the ‘Add Recipients’ button.

Click to enlarge
Step 7: Sending a reply
The enquiry can be entered directly into the form within CRM or, alternatively, pasted in from another program (e.g. Outlook/MS Word). This helps maintain signatures and formatting. Once the enquiry has been drafted/pasted, ensure that all of the fields have been filled in. The enquiry can then be sent using the ‘Send’ button at the bottom of the screen.
Click to enlarge
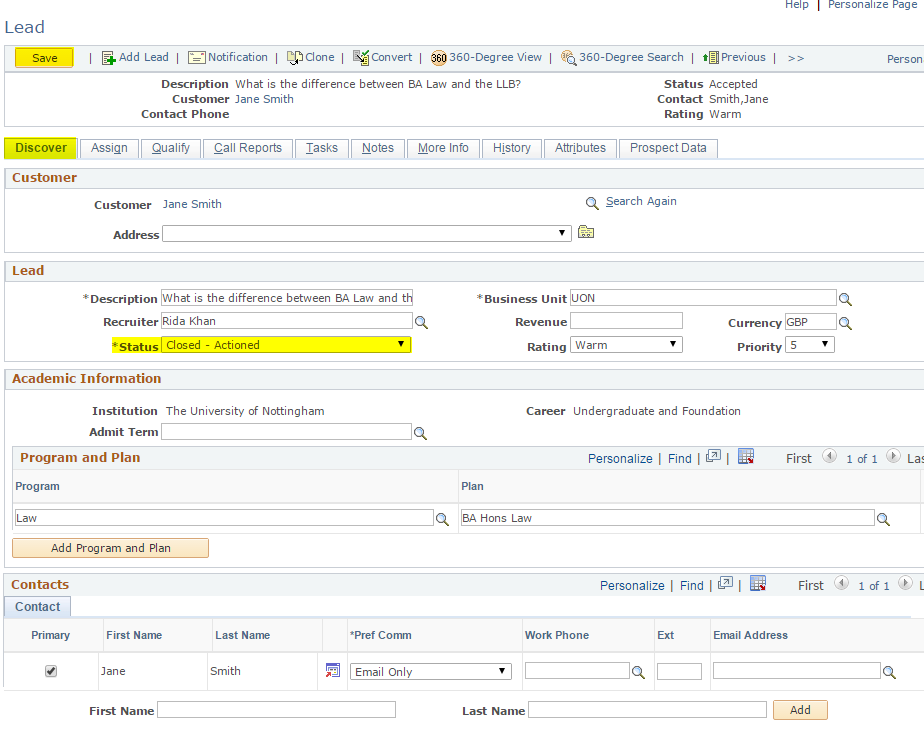
Step 8: Closing a lead
Once the reply has been sent, the status of the enquiry needs to be changed using the ‘Discover’ tab. As this enquiry has been dealt with, the status should be changed to ‘Closed – Actioned’. Finally, the enquiry should be saved, and the user can return to the list of leads by clicking ‘Search Leads’ at the top of the page.
Click to enlarge
We hope that this blog post has provided some insight into the functionalities available through the systems that support enquiries – thank you to Rida Khan for providing the screenshots and explanations. In the next blog post of this series, we will be looking at assigning a lead to someone outside of the Enquiry Centre. If you have any questions or feedback, please don’t hesitate to leave a comment below. You can also subscribe to the blog to have these updates emailed directly to you by entering your email address into the box in the top right corner of this screen.
No comments yet, fill out a comment to be the first
Leave a Reply